Quick Start Guide
If you have loaded this ‘Quick Start Guide’ from the test editor then you can skip the first part and also the sections on saving the scene and using on a WordPress Page.
Invoking the Editor
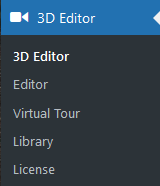
1) Select Editor from the WordPress Admin Menu.
Start Creating a New Scene
A list of all your current scenes will be displayed.
2) Select Add New Scene from the ‘list all scenes page toolbar’.

An empty Scene Editor
An empty Scene Editor will be displayed.
The image to the right shows the main areas of the editor.
Adding a Light
You need to add a light into the scene as the default text which we will add in the next scene requires a light in the scene, otherwise it will not appear!
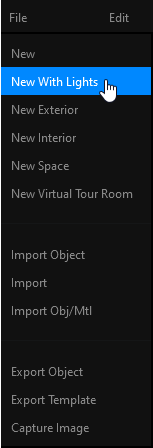
3) Select New With Lights from the menu File.
Add a Directional Light to the Scene
Selecting New With Lights is the normal way to start any simple scene as it allows you to choose
the background colour, add lights, select an optional ground plane etc.
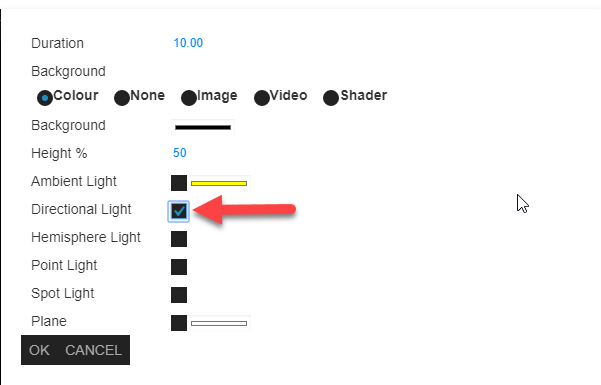
4) Click on the checkbox Directional Light in the dialog box.
As with all dialogs within the Editor, you can leave most options with their default values, as the Editor sets the most common default values.
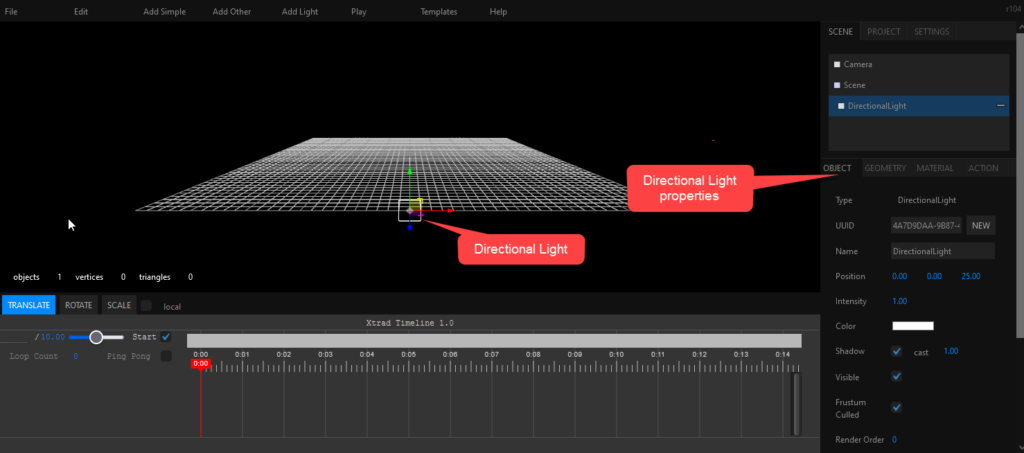
A Scene Editor With a Single Directional Light
A Scene Editor with a single Directional Light will be displayed.
The image to the right shows the background colour has been set to black and the selected object, the ‘directional light’ is displaying the drag handles for moving it.
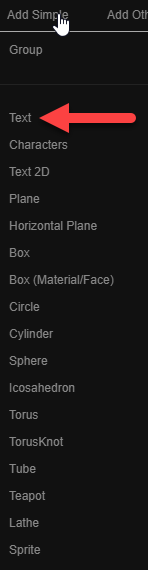
Adding 3D Text
We will now add 3D Text into the scene.
5) Select Text from the menu Add Simple.
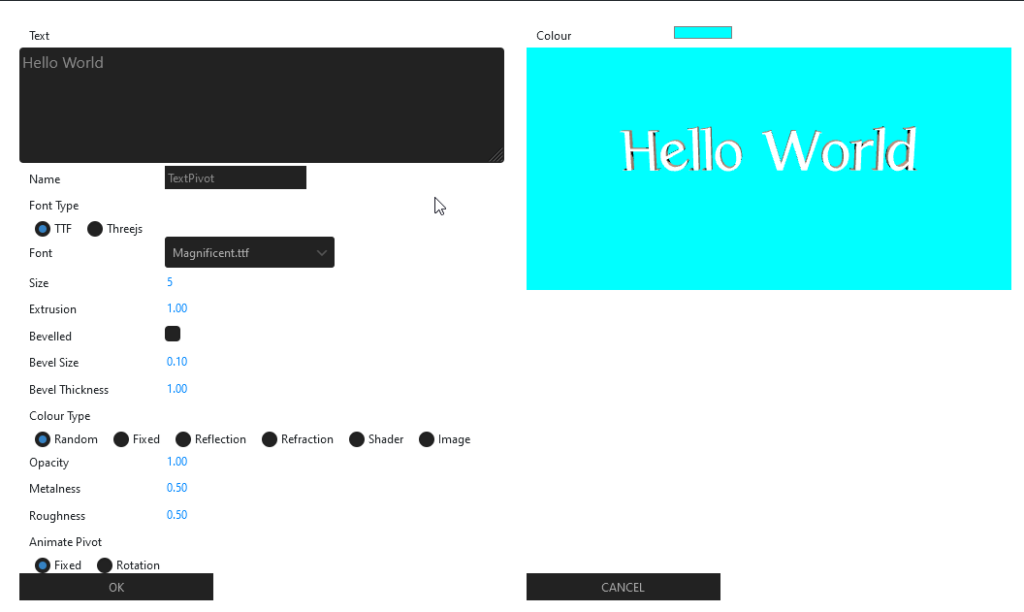
The 3D Text Dialog
6) Type some text into the text field. We will add the standard Hello World
Leave all the other fields with their default values and click on OK
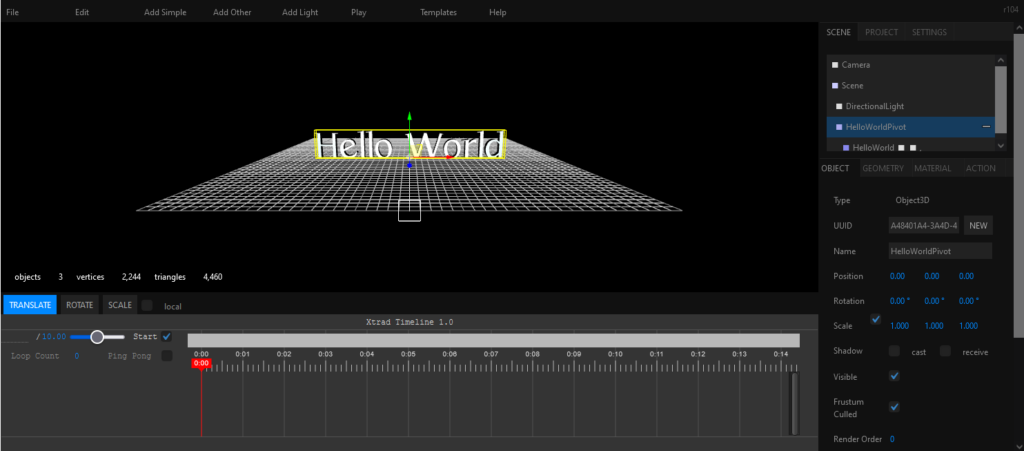
A Scene Editor With a Light and Text
A Scene Editor with your text and a single Directional Light will be displayed.
The image to the right shows the text pivot point selected.
When the 3D text is added into the scene, the editor creates two objects:
- The 3D text object, in this case named HelloWorld
- A parent group object, in this case named HelloWorldPivot
The parent object is created to allow translation, rotation and scaling of the centre-point of the text as can be seen in the image on the right.
If you want to manipulate the text itself you need to click on the HelloWorld object in the Scene Graph.
You can move the Camera around, by holding the left mouse button down and dragging the mouse, to see the scene from other angles. You can zoom in and out of the scene by using the mouse scroll wheel.
At this point you could save the scene and display it on a web page. The scene would display the static text Hello World.
Animating the 3D Text
To apply a simple animation to the text we could simply use the timeline,
however, the editor provides Animation Macros for adding simple animations into the timeline.
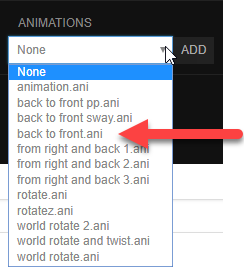
7) Select back to front.ani from the ANIMATIONS section of the properties for the text.
NB make sure that the object HelloWorldPivot is selected first. Then click on the ADD button.
The Timeline
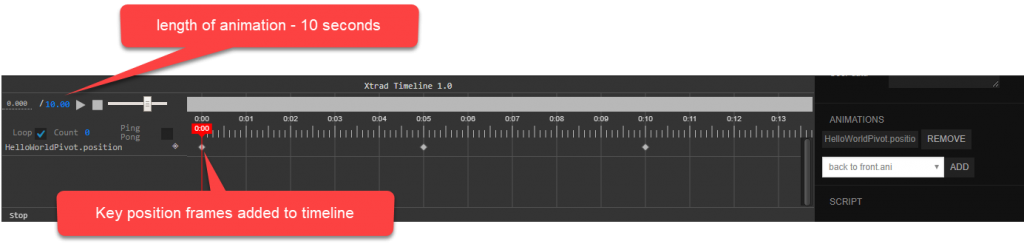
The animation macro has created 3 position keyframes in the timeline as you can see in the image on the right. You can compress and expand the timeline by using the slider.
The animation length is 10 seconds and it has been set to loop.
The text will move from the rear of the scene to out of the front of the scene during the 10 seconds and then start again.
To see what this will look like click on Play from the menu bar.
Saving the Scene
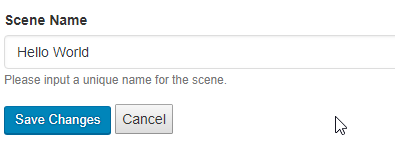
8) You can now save your scene by typing a name into the Scene Name field below the editor and then clicking Save Changes.
The position of the camera used for the display of the scene on the web page is the current Camera position when you click Save Changes
List of Current Scenes
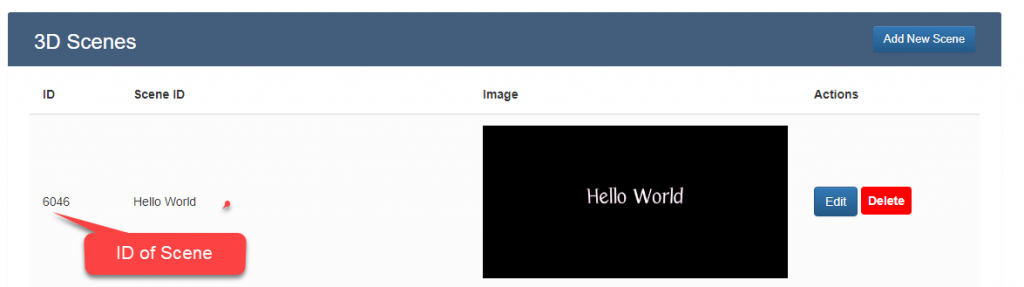
The saved scene is displayed in the list of your current scenes.
You should note the scene’s ID if you intend to add a shortcode manually to your web page.
In this case the shortcode would be, in square brackets:
xtradscene id=”6046″
Adding a Scene to a Page using the Standard Editor
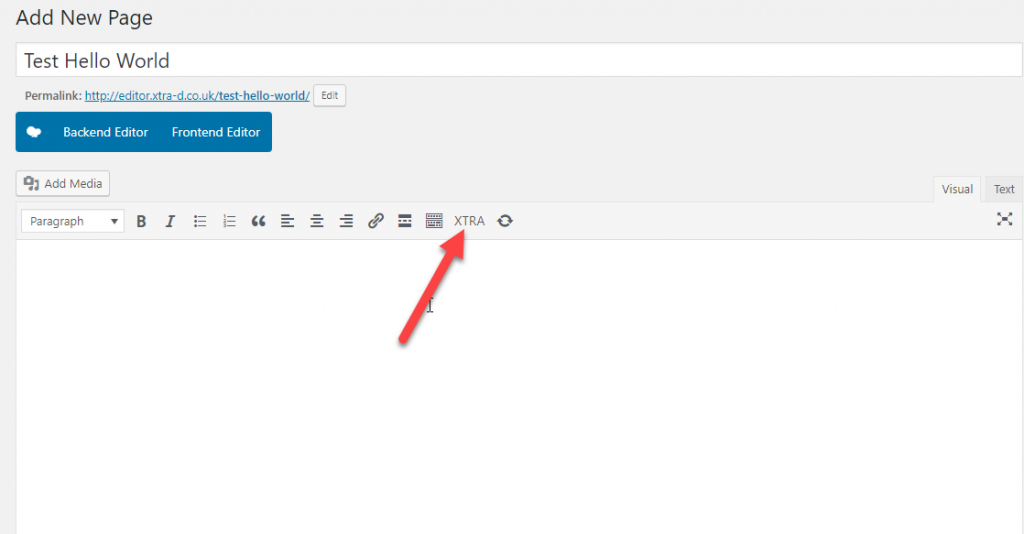
You can add a scene to page by using the standard editor.
9) Select XTRA from the editor’s toolbar.
Selecting the Scene from the Standard Editor Popup
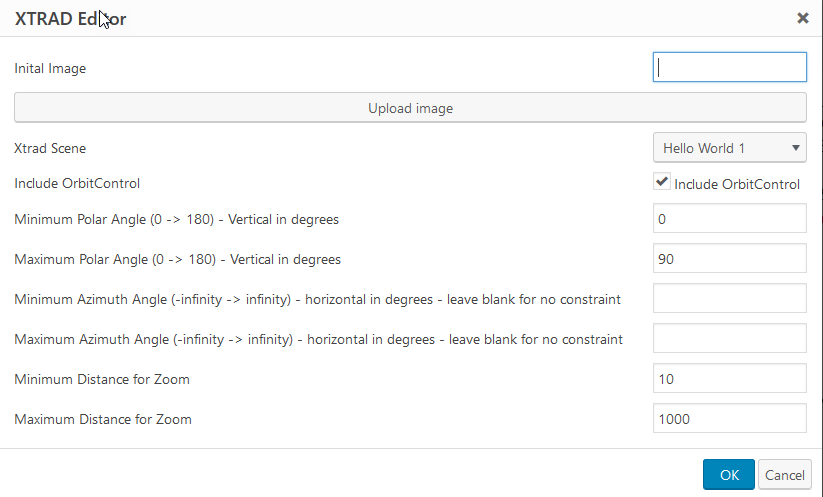
A popup dialog is displayed.
10) Select Hello World (or the name of your scene) from the popup’s dropdown list.
You can ignore the setting for initial image. When a page first loads containing a Scene an initial image is displayed while loading the actual 3D Scene.
By default, the still image captured when the scene is saved in the editor, is used. The initial image field allows you to choose an alternative image.
You can leave all the parameters set to their default values.
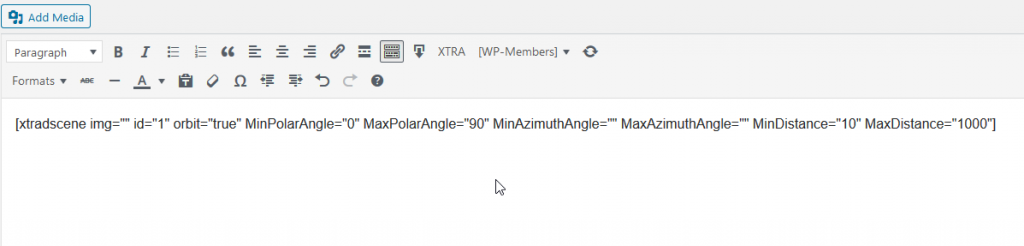
Scene Added to Page
The contents of the editor window show the shortcode added.
Adding a Scene to a Page using the WPBakery Page Editor
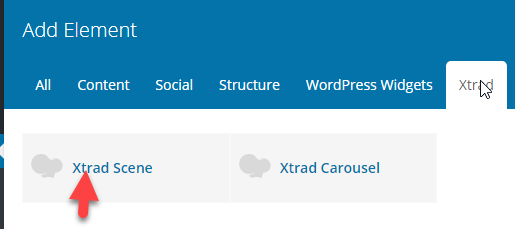
You can add a scene to page by using the WPBakery Page Editor if you use it.
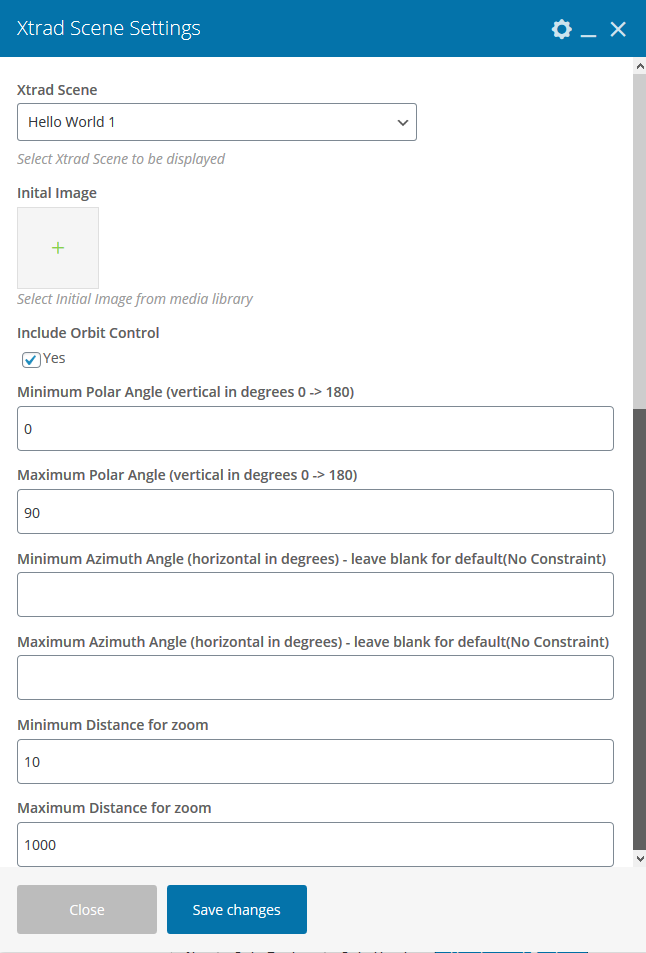
11) Select Xtrad Scene from the editor’s toolbar.
Selecting the Scene from the WPBakery Popup
A popup dialog is displayed.
11) Select Hello World (or the name of your scene) from the popup’s dropdown list and click on Save Changes.
You can ignore the setting for initial image. When a page first loads containing a Scene an initial image is displayed while loading the actual 3D Scene.
By default, the still image captured when the scene is saved in the editor, is used. The initial image field allows you to choose an alternative image.
You can leave all the parameters set to their default values.
Congratulations
Once you publish your page you can view your scene on the published page.
The width of the displayed scene is set to the width of its container. Place it inside a div with width of 100% if you want it to occupy the width of the page.
The height of the scene was set at 50% of the width using the default height ratio set by the editor.
If you clicked on Include Orbit Control you can spin the scene using your mouse.

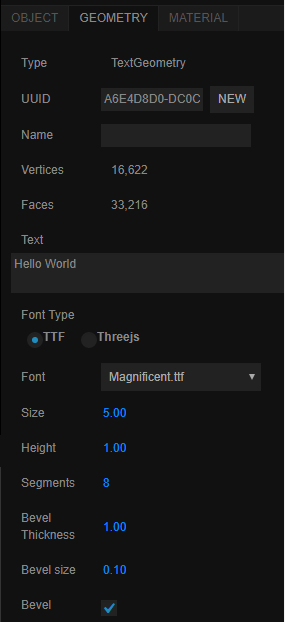
Further Experimentation – Manipulating It’s Geometry
You can change geometry parameters for the text by first selecting the text object in the Scene Graph, not the text pivot,
and then selecting the GEOMETRY tab in the properties.
You can change the text, the font, size etc.
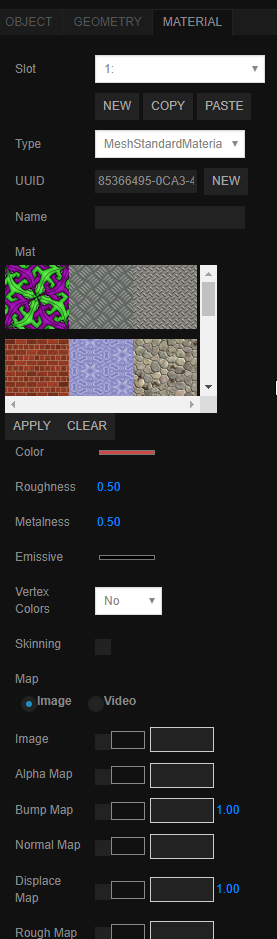
Further Experimentation – Manipulating It’s Look
You can change material parameters for the text by first selecting the text object in the Scene Graph, not the text pivot,
and then selecting the MATERIAL tab in the properties.
You can change the colour etc.
Note: the text is mapped with 2 materials, in slot 1 and 2, which can be set independently.
The faces of the text material is set by slot 1 and the extrusion material by slot 2.